
Case Study
“Design a snack ordering app for a movie theater”
That was the prompt I landed on. While I had many vague ideas for a digital experience I wanted to create, none were specific enough to create for this course. Instead I used the prompt generator to arrive at an entertaining and interesting challenge for myself that actually solved a problem. It turned out to be a great choice to learn from.
Initial Steps
Following the modules of the course in order, I started by creating personas, building empathy maps, and identifying pain points in other common movie theater apps.
Quickly, I realized that I had already made too many assumptions about the average user-groups. Originally, I thought “Ok, I’ll make an app for people who want a snack delivered to their seat. A small scale Uber-eats.”
This app isn’t just for people who want to order a convenient snack. When I started to explore the kinds of people that could use an app like this, I thought about the last-minute planner, ordering snacks on the way to a movie they decided to see minutes ago. I thought about the health-conscious moviegoer who wants to plan how much they are willing to spend and eat. And (somewhat embarrasingly) it wasn’t until this stage that I thought about all moviegoers with accessiblity concerns that could have a genuine benefit with a snack delivery method.
First Draft User-Flow
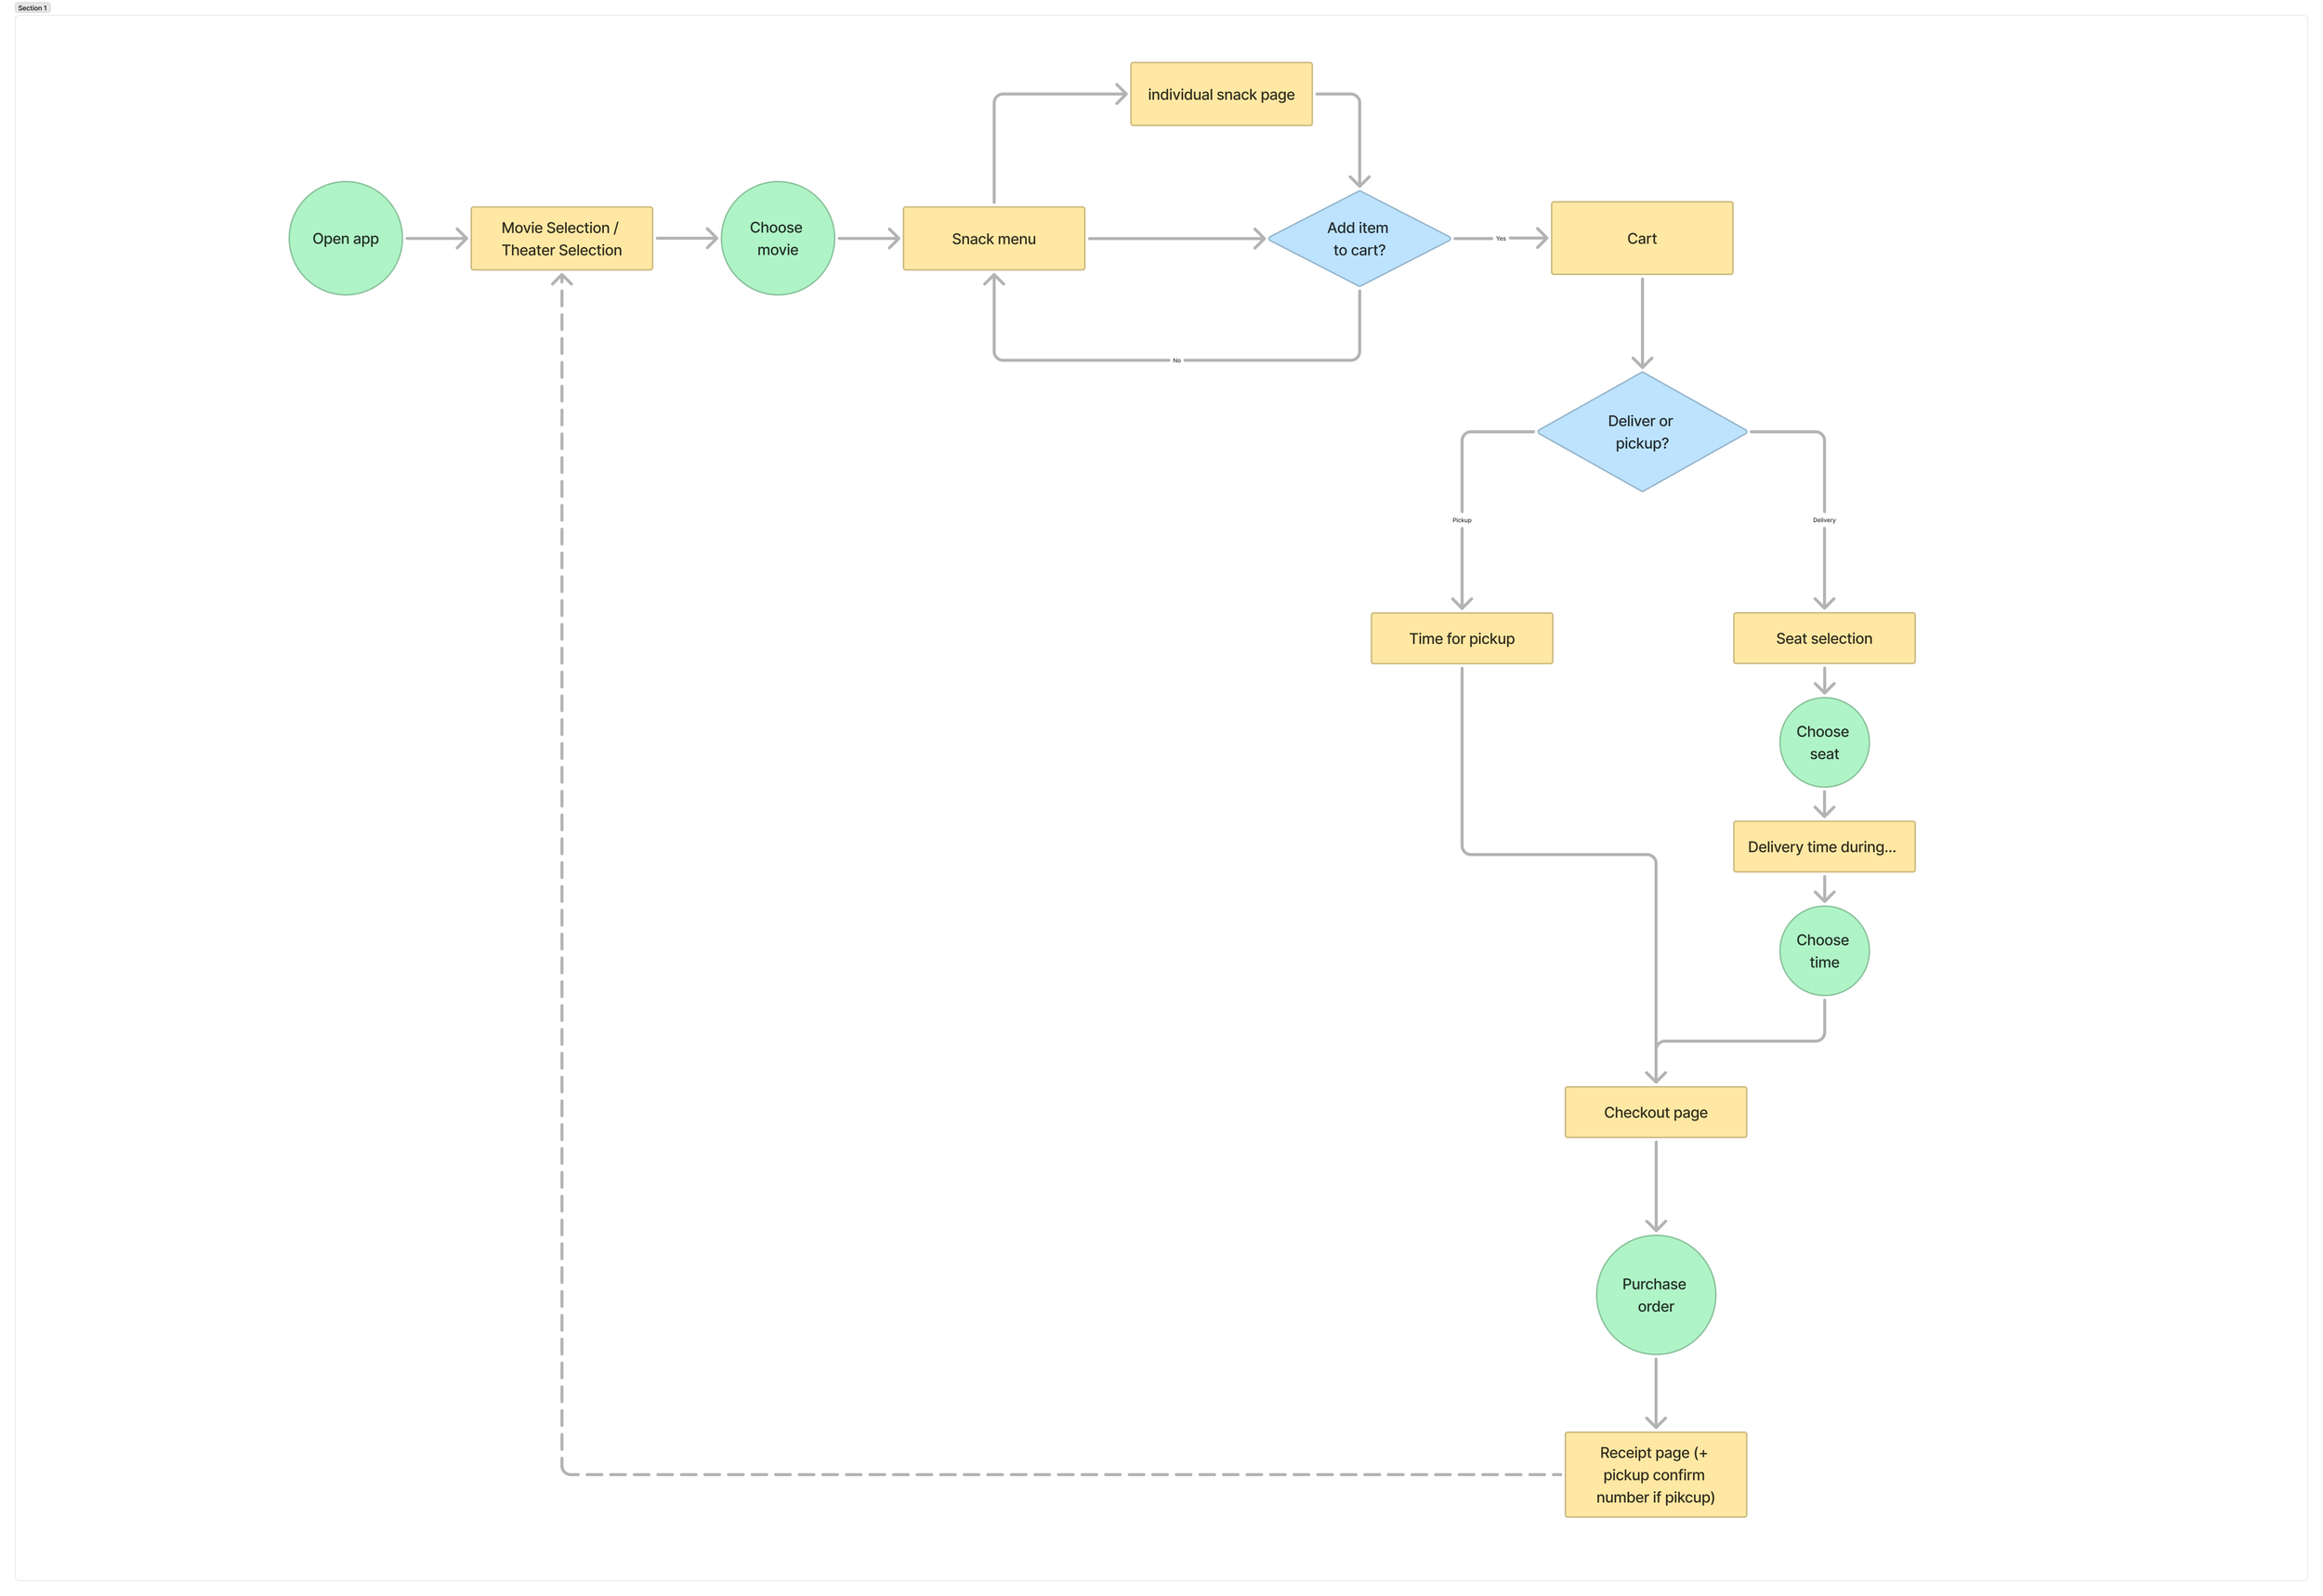
With the personas in mind, and comparable apps explored, I created an initial user flow that identified the core tasks needed for a user to get their snacks. Users would:
Select a movie (and time)
Select their snacks which would get added to a cart
Choose between delivery to their seat,
or pickup from the concession standInput and confirm payment
Finish by receiving order confirmation screen
This early flow helped me plan the screens I’d need to make, decision points that needed to be accounted for, and potential friction areas; junctures that I would need to pay special attention to users’ experiences during testing.
Wireframes
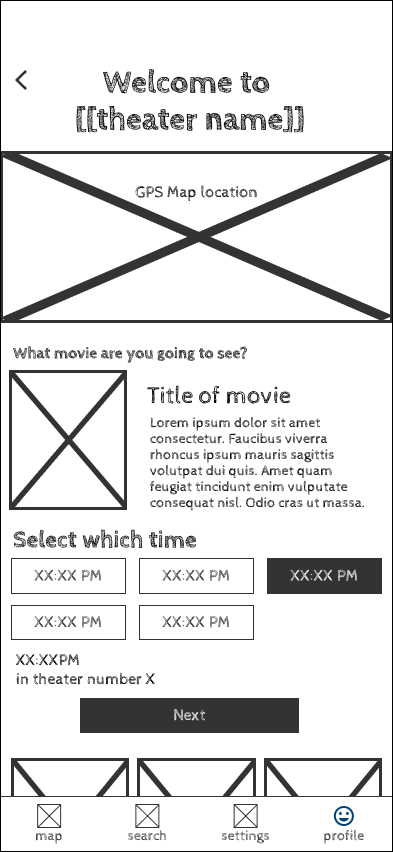
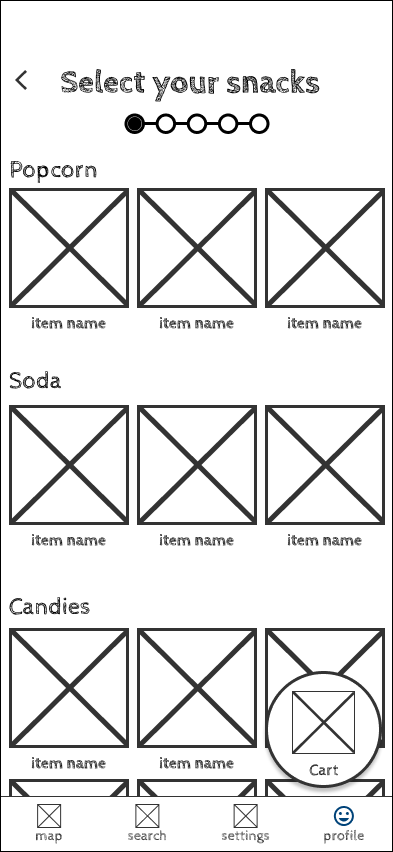
Once the user flow was done, I sketched some out the primary screens–first on index cards, then in Figma using a wire-framing asset set. These screens included:
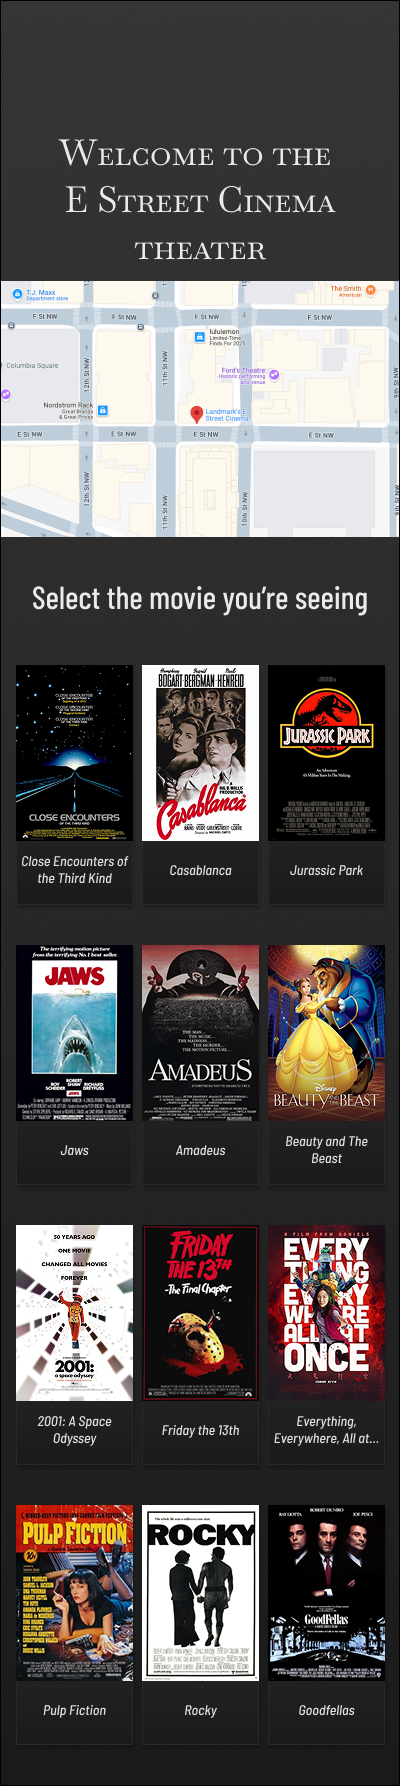
Movie selection
Snack menu
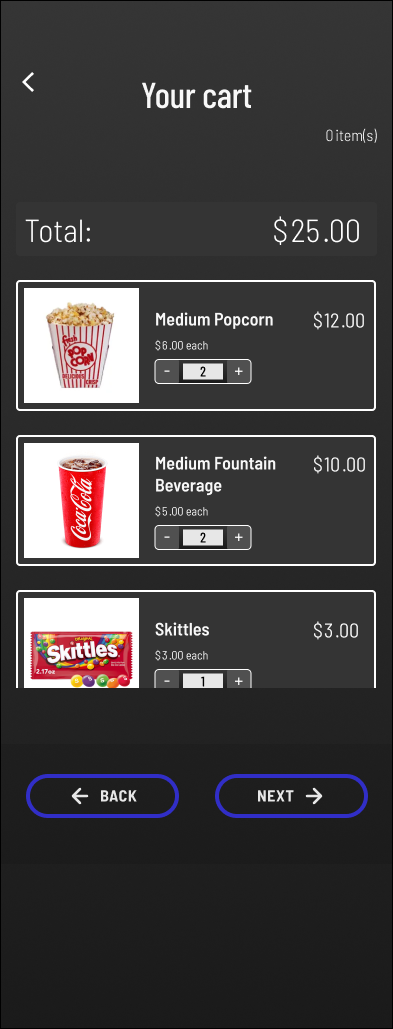
Shopping cart
Checkout confirmation
Additionally, other screens I created in this stage included a screen for seat selection, and a time selection for when the snacks should be delivered. Both of these did not make it to the final prototype, but I was glad that I tried them out at this stage. (More about that below)

Low-Fidelity Mockups
Using these wireframes, I built a clickable prototype that simulated the end-to-end experience. It allowed users to:
Pick a movie
Browse snacks
Add items to their cart
Select a delivery seat
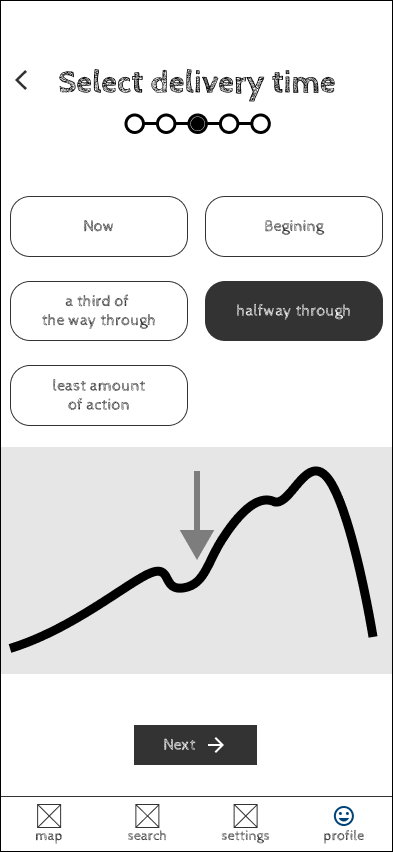
select the time on the “action graph”
With this functional prototype, I got to testing. While I didn’t have an official testing group to utilize, I did at least have friends that love to go see movies!

First among the changes was the “action graph” delivery time. My goal was to create an interface that allowed a user to select a time for delivery in the movie. But not just that, a time in the movie where an employee delivering the snack wouldn’t interrupt the show too much! A graph was used to display the most “Action” a movie might have, so a user could surmise when they wanted the delivery.
That interface was not at all intuitive, nor delivering that message. Users testing the prototype were immediately stumped about what the graph was for. So, I removed it!
Testing
Once I had a functioning prototype available, I asked friends to test my app and give me feedback. Per the coursework, I also created a testing grid and interview sheet. I asked questions like
one
two
threww
And I also established KPI’s that I would measure to examine usability. These included the time spent from initialization to completion and most common screens for friction points.
Results of testing
Maybe it’s because it was my first time testing a real functioning prototype with other people, but I was surprised at how much notes and feedback I got! Rookie mistake, making the assumption that everyone thinks the way you do.
Secondly, I made a mistake in assuming how a user would select a seat to deliver to. Initially, I thought users would want to select a seat as if selecting a spot on a plane. But this was an incorrect premise. As one friend pointed out “Wait, I’ve already bought my ticket to my seat. I shouldn’t need to select the same seat again.” I don’t want to confuse users by making them repeat a screen they likely saw already when they purchased the ticket. That would need to change.
Finally, as a small point of pride, one area I got no comments on was the shopping cart. I am very pleased that I was able to make a functional shopping cart system in Figma that updated prices based on quantity. It was a lot of work and took a lot of variables, but it turned out so well.
High-Fidelity mockups
After the testing phase and continuing the course, I went back to my designs and made edits. I removed the action graph screens, and I recreated the seat input field to be a numeric keypad, rather than a seat selection tool. I also made accessibility changes like increasing the button size on the cart selection cards. Finally, I refreshed or recreated a lot of the design assets that I used. It’s weird, but I find that I really enjoy working with asset libraries and sticker sheets, and it was really cool to watch how Figma cascades changes throughout the file.
Research
Followin


Conclusion
This Coursera education was an in-depth and extensive UX Design simulation from start to finish. And although I had some frustrations trying to emulate a real UX Design environment (hard to host a design critique entirely on your own), I felt very confident that I got a clear experience of all stages of the UX design process. Below are some of my key lessons that stood out.
There’s always more users than you first assume
It’s easy to start on a project and quickly identify the users you think will use the product or experience most. But taking more time to consider who else might, and also how including them might make for a better product, is worth it. Had I only created this app for the users I thought about initially, I might never have designed the “pickup from counter” user-flow.
The testing can remind you of the obvious
Testing with many different users in many different dimensions is critical to create the best possible product. In this instance, I had so blindly assumed that my seat selection process was correct that I would have never reviewed it unless a friend had not pointed out the friction during testing. After saying it, it felt so obvious, but I likely would not have given it a second thought otherwise.


Components are awesome
Like I said above, I derive a weird nerdy joy from design assets and sticker sheets. Creating flexible, scalable assets in Figma that were easy to amend and improve saves so much time and headache. In the middle of this project, I also learned about “Semantic Design Tokens” and became fascinated, so I started using them in this project too.
Keeping things in stages is essential
Upon getting my prompt, I was tempted to immediately start drafting snack selection frames in Figma. But that would have become too messy and my focus would have dissolved. By creating in stages–first as a user journey, then wireframes, then lo-fi, then hi-fi– I created a better, more accurate experience and had many more opportunities to refine and account for things I initially missed in the previous stage.